

If your renders lack a professional touch, it’s time to watch how the pros do it. In today’s video, I’ve gathered a number of Blender short breakdowns so you can see the tricks that go into making a great render.
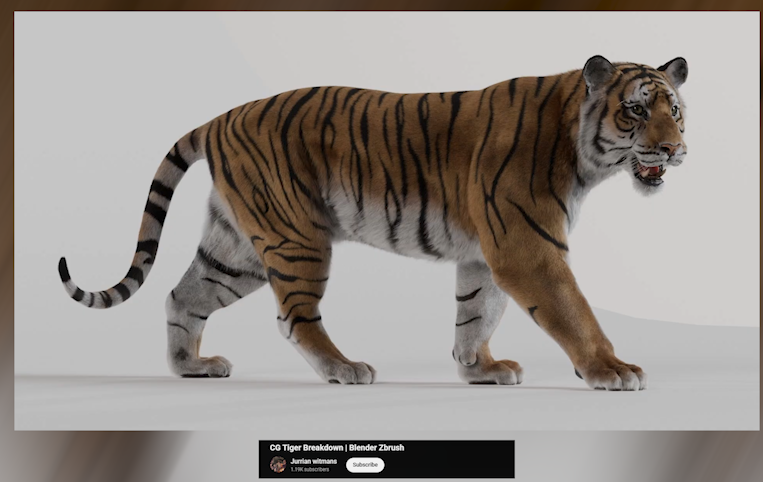
Starting with this realistic tiger breakdown by Jurrian Witmans:
You don’t get this level of detail without putting in the work. I mean these are the assets Hollywood movies purchase for their projects, so every detail doesn’t just count — it’s required. They start with a base mesh of a tiger, sculpt it, add textures, and then add fur. It sounds simple when you say it fast, but each of those steps takes serious skill and patience to execute at this level.
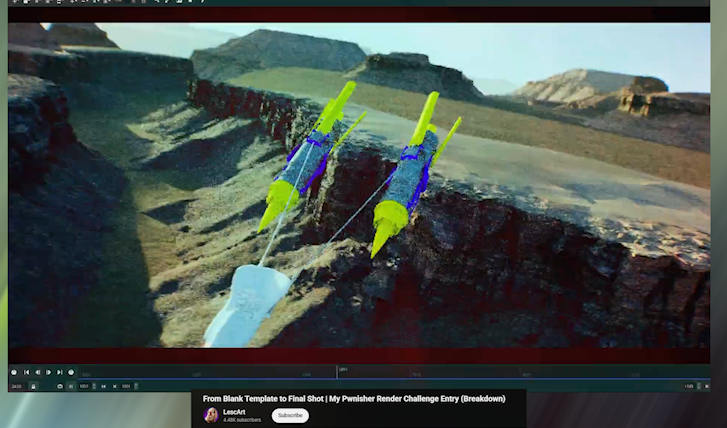
Another great breakdown this week is from LescArt:
Now look away if you’re used to lazy quick workflows, because this breakdown, while it’s just 13 minutes, think of the amount of work put into this 30-second video for a YouTube challenge. It may make you rethink your whole life. This was a journey through several 3D applications and disciplines — from Houdini, 3ds Max, PureRef, V-Ray, terrain generators, Nuke and more. For some people it’s truly not about the money, but for the love of the game.
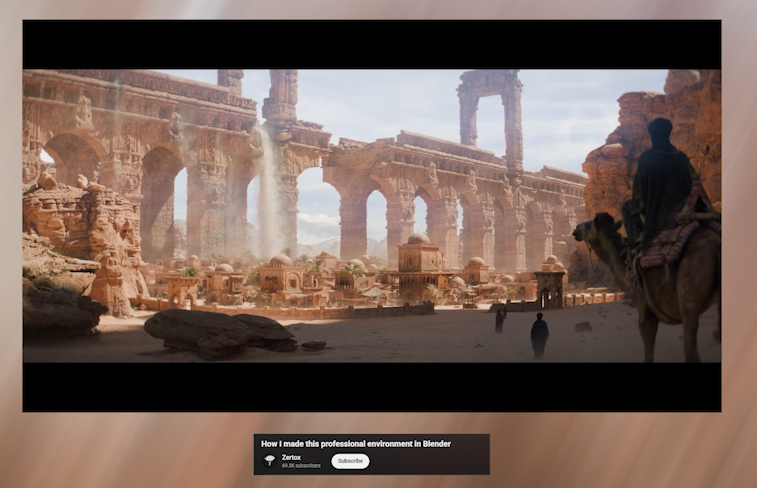
Another artist who does great renders and breakdowns is Zertox, and this caramel one is definitely the best I have seen from a Blender artist:
Their use of Houdini to create secondary effects like footstep dust and the waterfall in the background is remarkable. Most artists would skip these small details just because they are small and will likely be missed, but not Zertox. I guess that’s why the render is nearly 400K views on YouTube. They also have more amazing renders we have featured on the channel — just check out their recent demo reel to be blown away.
They made us believe Cinema 4D is the king of motion graphics, mostly because there weren’t many breakdowns like these showing how capable Blender is in this field:
https://www.pinterest.com/pin/127578601939138577/
So I’m making it my life goal to show off these renders and breakdowns — not because Blender is better, but to let everyone know it’s a viable alternative and can be equally as good as Cinema 4D when it comes to motion graphics.
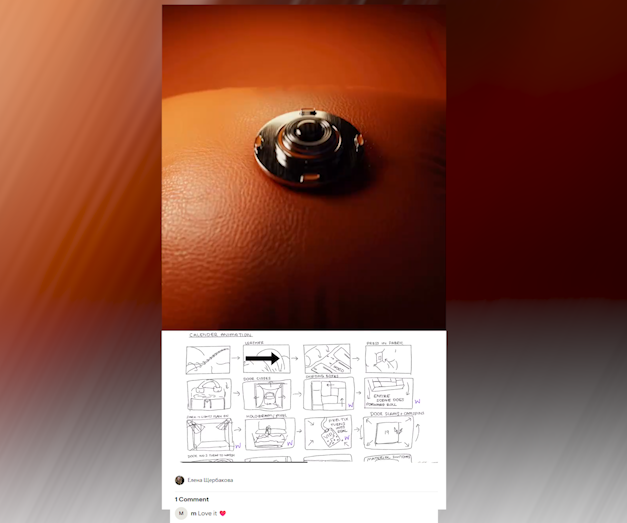
If you ever wondered whether you need to be great at drawing to create storyboards, this breakdown should clear that up for you:
https://www.pinterest.com/pin/5488830792215269/
Not saying Елена Щербакова isn’t great at drawing, but compared to these drawings I’m Picasso. Still, they are good enough for storyboarding, and you can see how closely the final render follows them. Storyboards are an important part of the art process. They reduce time wasting and make it easier to focus on what will actually matter in the final render.

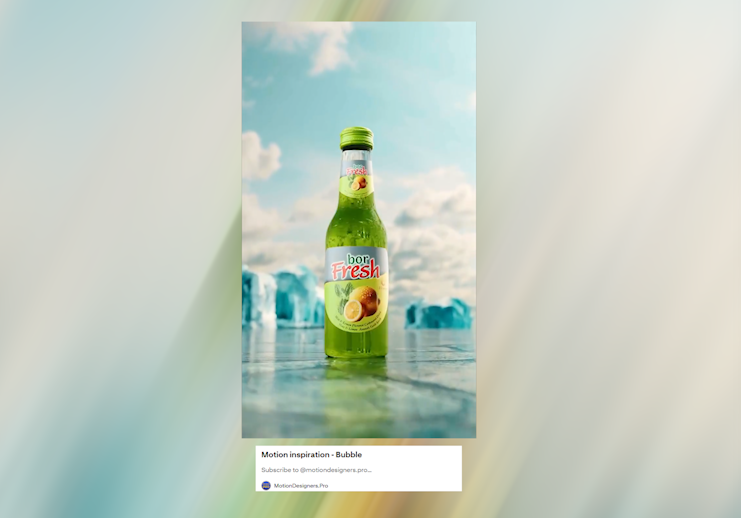
Most times you don’t need complicated setups or animations to create great motion graphics. What you need is a clear vision and proper execution of your imagination, and that’s exactly what David23 did here:
https://www.pinterest.com/pin/8585055536365254/
You don’t see complicated simulations or rigs — it’s just a few curves, particle systems, a few modifiers, good camera movement and lighting, all working together to execute this beverage commercial.
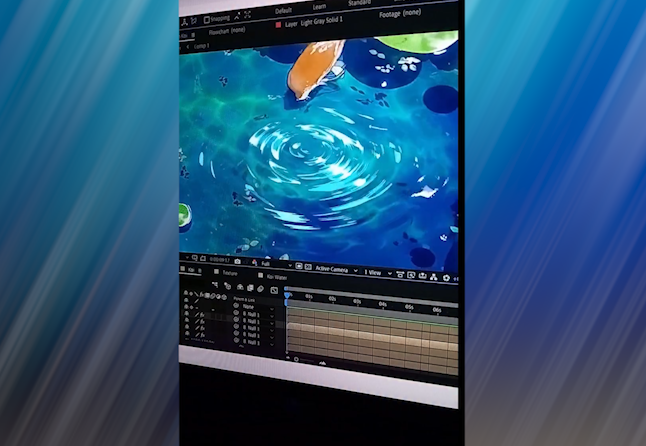
Here is another amazing breakdown, again from David23, this time using After Effects:
https://www.pinterest.com/pin/70437490652819/
This one might require good experience, knowing what effect can convert into what you need. To make the stylized ripples in the scene, he adds a ripple of waves on top of the video and uses it to create specular highlights and refraction in the water — all without using complicated shaders or materials.
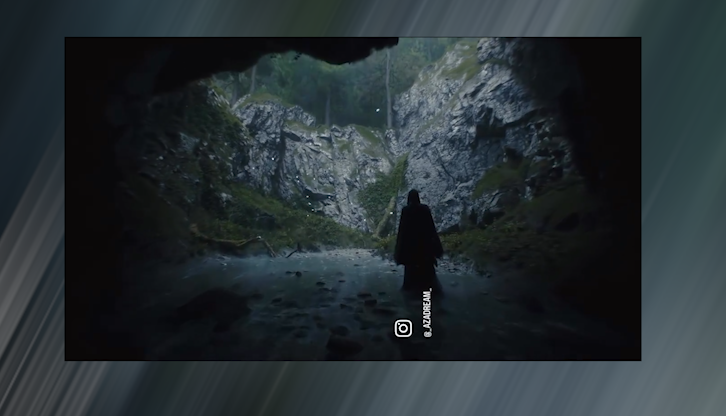
Let’s count how many programs were used in this render by Azadream on Instagram:
https://www.pinterest.com/pin/18225573488456058/
We begin in Blender for the scene setup. The assets are likely Megascans, though they don’t really show Quixel Bridge in the breakdown. Next we have Marvelous Designer. Yes, Blender can do cloth simulation, but if you want great quality fast, no one beats Marvelous Designer. Then we have smoke simulation in what looks like EmberGen, Blender again for particles, SpeedTree for vegetation and trees, and final render in Cycles. That’s more than six programs, and the results are exceptional. It just shows that the right tool can shave hours or even days off your project while increasing the quality you produce.
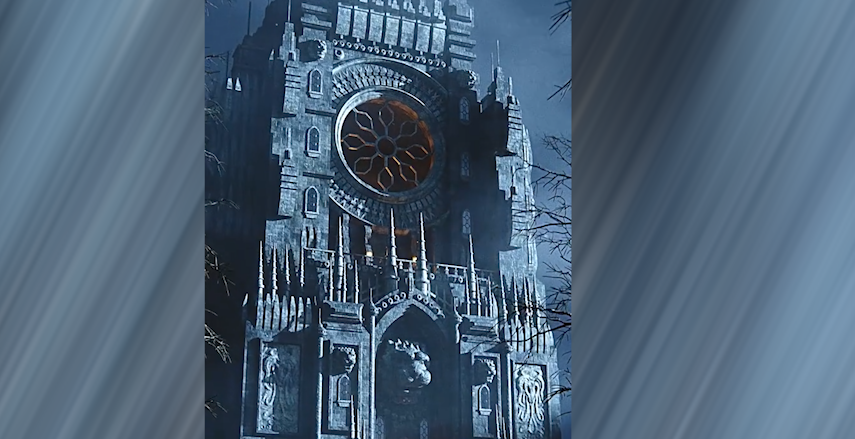
I love watching these timelapses where you see a complicated structure start off as simple extrusions:
https://www.pinterest.com/pin/1548181185862096/
It puts everything in perspective — no matter how complex something looks, the building blocks are usually simpler and attainable. Most of the structure is repeated small details like this, combined with detailed materials and texturing techniques to reduce repetition while maintaining human scale and realism. It’s a big building, but those visible small building blocks ground it in reality.
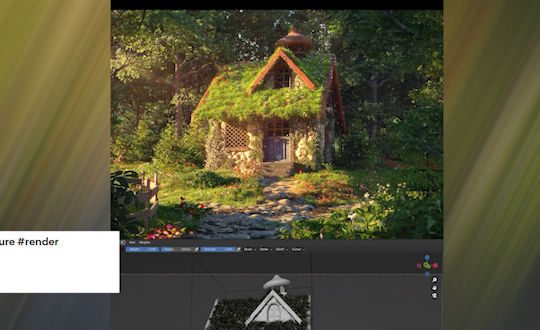
Speaking of small, look at this tiny house by Adamarchh:
https://www.pinterest.com/pin/13018286421802823/
I believe they have a full timelapse on their YouTube channel if you want to check it out. Again, they’re using simple tools like sculpting, extruding and polygon editing to go from something basic to something fully built up. Where you would struggle in this scene is the vegetation — it’s nearly impossible to make all the different grass blades, flowers, trees and plants on your own while maintaining detail and quality. I’m not sure which library they used, but if I had to guess something like Botaniq or Arborea might have been involved.
If you have amazing renders you would like to show off yourself, make a breakdown and share it in the comments. I’ll feature it in the next video. If you’re not sure
how to make breakdowns, Cinematic Cookie has a complete guide on their YouTube channel:
There’s also a great add-on designed specifically for making breakdown presentations if you plan on doing them often — it can really help with presentation and portfolio work.
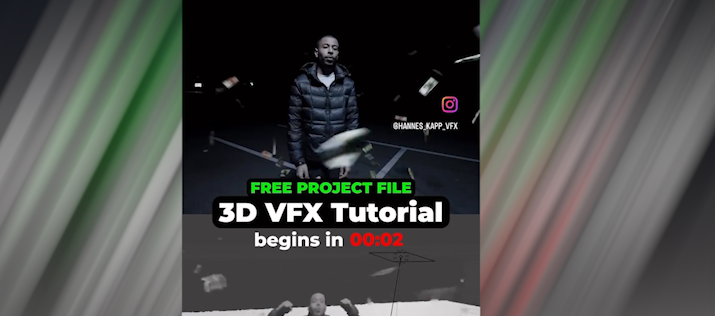
If you’ve ever wondered how Blender can be used for VFX in music videos, here’s Hannes Kapp on Instagram to show you:
https://www.pinterest.com/pin/889812838907190163/
Using particle systems, forces, and keyed green-screen footage of the singer, you can create a simple money rain effect in just a few clicks.
I love these complicated mechanical rigs. What’s more impressive is that you don’t see intersecting issues, and the rig doesn’t even look overly complicated — unless there are hidden helper bones doing the heavy lifting:
https://www.pinterest.com/pin/492649953885033/
Rigs like this are one way to instantly increase the production value of your render because they’re rare and difficult to pull off cleanly.
And that’s it for today. If you want to check out the artists, all links are in the description. Thanks for watching — see you in the next one.