
Yo, what is up, everybody? Welcome back to the channel. Okay, so look, I love Blender. I do. I have been using it for years. It is free, it is open source, the community is incredible, and honestly, it punches way above its weight class.
But every time I open Houdini and start exploring, I get this little feeling in my stomach. That feeling of, why can’t I do this in Blender?
Today, I am letting it all out. I am making the definitive list of Houdini features I wish Blender had. We are talking about native solvers, procedural workflow features, and some of the Blender addons trying to bridge the gap. So, grab your coffee, subscribe if you haven’t already, and let’s get into it.

First up, and this one is beautiful: TimeShift.
For those who don’t know, TimeShift allows you to treat time almost like another parameter inside Houdini. You can run a simulation, whether it is cloth falling or an explosion going off, and then manipulate its timing. You can reverse it, slow it down, loop a section, offset it, or completely remap how it plays.
In Blender, we have the timeline, frame ranges, and a few options for adjusting cached animations. However, if you want to do something more complicated with the timing of a simulation, the process quickly becomes messy. You may have to export the simulation, convert it into another format, or build a complicated workaround.
Come on, Blender. Give us time as something we can manipulate procedurally.
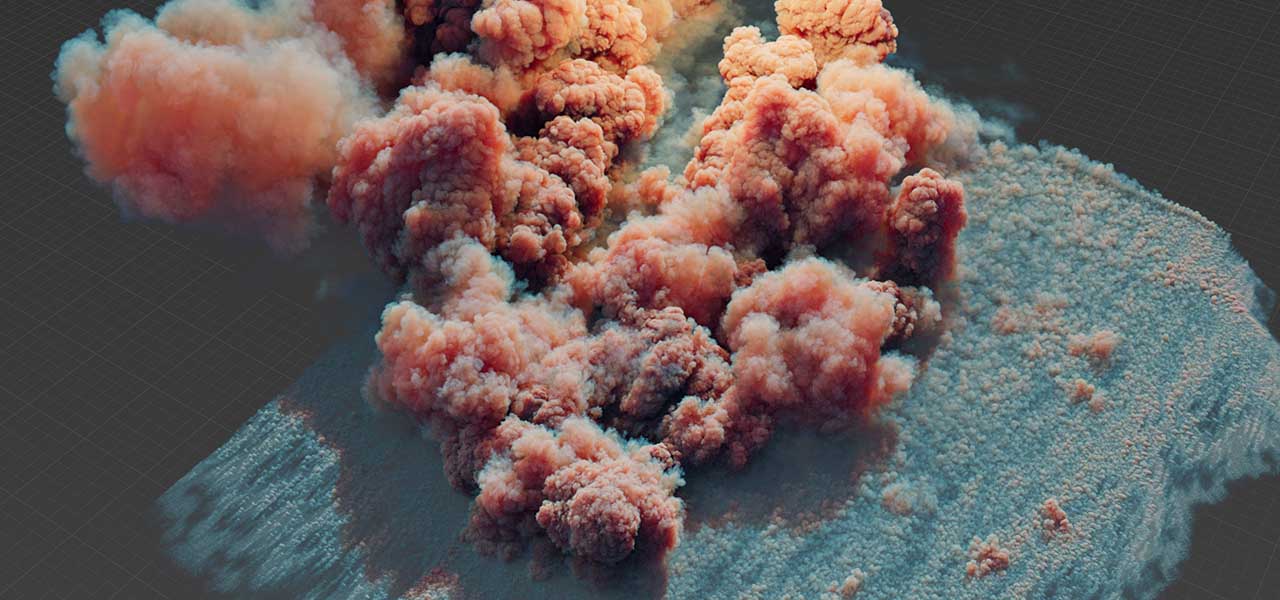
Number two, and this one is for all the fire and destruction artists out there: Pyro Spread.
In Houdini, you can paint a fuel map onto a building, choose an ignition point, and have the fire spread across the geometry. It can crawl along walls and move from one part of the structure to another based on the fuel attributes you created.
With Blender’s Mantaflow system, you can create some great-looking fire, but there is no equally elegant workflow for saying, “Start the fire here and make it spread across this surface.” You usually have to fake it with animated emission textures, vertex groups, or several carefully timed fire sources.

Number three is mesh caching.
I know Blender supports Alembic and USD, but Houdini’s File Cache workflow is on another level. In Houdini, a cache is simply another node in the network. You can bypass it, replace it, offset it in time, branch from it, process it further, or switch between different cached versions without disconnecting it from the rest of your workflow.
In Blender, once you bake a simulation or export a cache, it can feel final and disconnected from the original setup. I want caches in Blender to feel like living parts of the node tree instead of finished files sitting outside the procedural workflow.
Number four, and this one makes me genuinely jealous: MPM, or the Material Point Method.
Snow that compresses, sand that collapses, mud that splashes, and materials that can behave as both solids and fluids can all be handled inside Houdini’s MPM system. It is especially useful for materials such as soil, snow, wet sand, concrete, and other substances that do not behave like a simple liquid or rigid object.
In Blender, if I want to simulate snow, I am probably combining particles, Geometry Nodes, displacement, and several different tricks. There is no unified native solver for these granular and deformable materials, and I really wish there were.
Speaking of granular materials, number five is Vellum Grains.
Houdini can simulate large numbers of individual grains of sand, rice, beads, stones, or similar objects as particles that collide, stack, compress, and flow. Because Vellum is a unified constraint-based system, those grains can also interact with cloth, soft bodies, hair, and other Vellum objects.
Blender can scatter huge numbers of particles or instances, but scattering is not the same as simulation. A true high-count granular solver, where all those particles collide and pile up naturally, is still missing.
Give us Vellum Grains, Blender. Let me pour digital sand into digital jars.
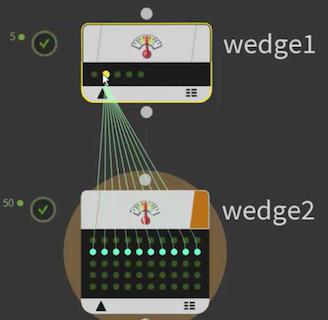
Number six is a massive workflow feature: wedges and TOPs.
In Houdini, you can create a parameter sweep and tell the software to generate the same explosion with 50 different turbulence values. Houdini can process those variations automatically and allow you to compare the results.
This is not limited to simulations. You can create hundreds of procedural assets, render different lighting setups, export several versions of a model, process files, or distribute jobs across multiple computers.
In Blender, if I want to test 20 simulation variations, I am usually changing a value, baking, rendering, saving the result, and then repeating the process manually. Blender does not have a complete native system for generating and managing these variations.
Number seven is KineFX, Houdini’s procedural character framework.

You can construct rigs with nodes, retarget motion capture, modify skeletons, blend animations, process motion, and build procedural animation systems. Because the skeleton and animation are represented as data, they can be manipulated using the same procedural concepts used for geometry.
Blender’s rigging and animation systems are powerful, but they are still much more manual. The idea of building a procedural walk-cycle generator, motion-processing system, or complete reusable rig inside a node tree is incredibly powerful.
Number eight is rigid-body destruction with proper constraint networks.
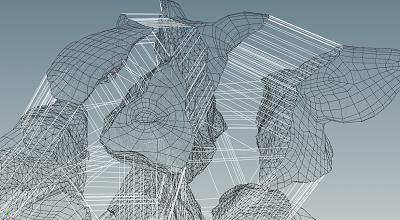
Houdini lets you represent the connections between fractured pieces as editable geometry. You can create glue constraints, cluster pieces together, change their strength using attributes, weaken specific areas, and decide how impacts should travel through the structure.
This makes it possible to create controlled demolitions where different sections break at different times and under different amounts of stress.
In Blender, you can fracture a mesh, add rigid bodies, create constraints, and get some impressive results. However, Blender does not give you the same procedural control over the complete constraint network. A lot of the time, you are simply hoping the object does not explode into pieces for no clear reason.
I want to feel like a demolition engineer, not someone pressing play and hoping for the best.
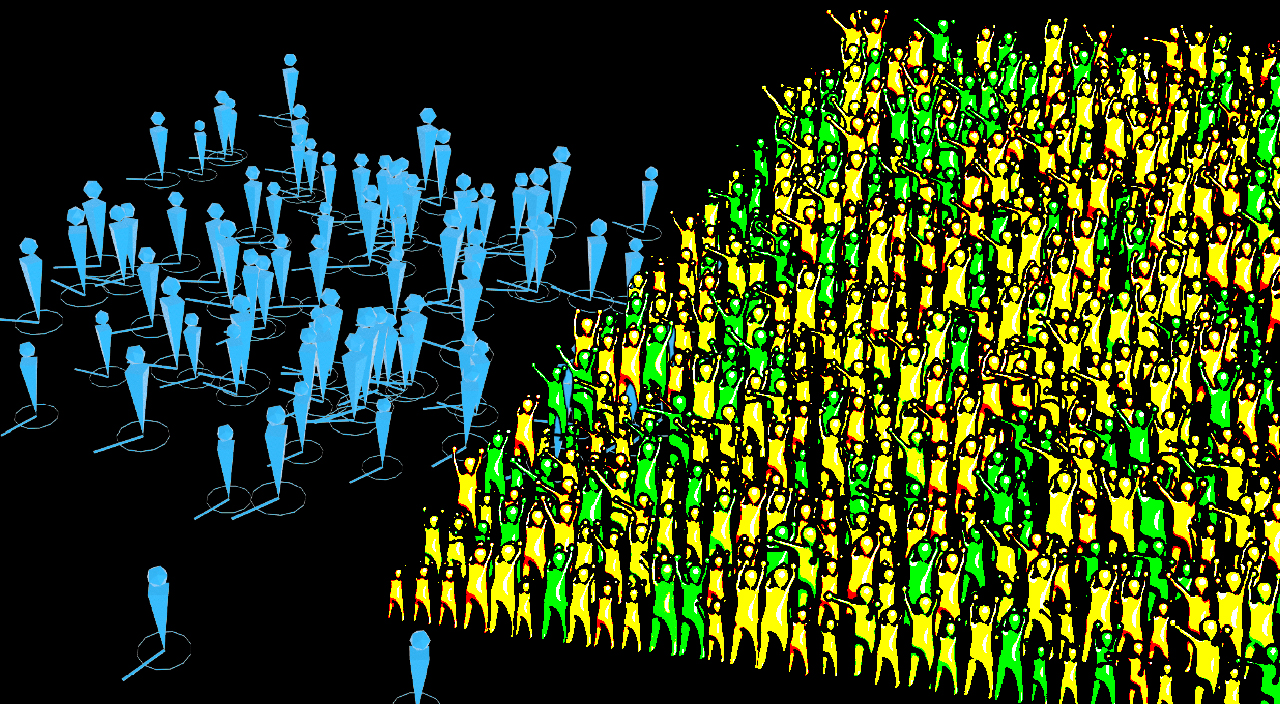
Number nine is crowd simulation.
Houdini has a complete agent-based crowd system with steering behaviours, obstacle avoidance, terrain adaptation, animation states, transitions, ragdolls, and interaction rules.
In Blender, we can instance animated characters with Geometry Nodes, distribute them across terrain, or make them follow curves. Those techniques are useful, but they are not the same as a real crowd system where every agent can make decisions, avoid obstacles, change animation states, and react to its surroundings.
Blender still does not have a complete native crowd-simulation toolkit.
Finally, number ten is VEX and the Attribute Wrangle node.
At practically any point in a Houdini network, you can add an Attribute Wrangle and write a few lines of code to manipulate points, primitives, vertices, or attributes. That code is processed efficiently across the geometry.
Geometry Nodes is amazing, but sometimes you need a very small piece of specific logic. In Blender, that can mean constructing a huge collection of math nodes, switches, comparisons, and field operations just to perform something that could have been expressed in three lines of code.
A code-based escape hatch inside Geometry Nodes would make the system dramatically more flexible. You could use nodes for most of the setup and write a small expression whenever nodes become unnecessarily complicated.
Okay, so I have spent the last several minutes talking about everything Houdini can do that Blender cannot. Before you download Houdini and start questioning all your life choices, we should talk about the Blender developers and addon creators trying to close this gap.
There are already addons bringing some of these high-end simulation and procedural workflows into Blender, and we need to talk about them.
First, if the Vellum Grains and MPM sections caught your attention, take a look at Hurricane.
Hurricane is building a more unified simulation architecture inside Blender. It already brings different simulation types, including fluids, cloth, soft bodies, and granular materials, under one system. The developers also plan to add more advanced FLIP-fluid and MPM solvers in the future.
I am especially interested in seeing how its MPM implementation develops. If Hurricane can bring a practical MPM solver into Blender, it could completely change what independent VFX artists can create without leaving the software.
You can find Hurricane on Superhive. I will leave the link in the description below:
https://superhivemarket.com/products/hurricane?ref=311
Next, let’s talk about textures.
Houdini recently introduced Copernicus, a GPU-accelerated 2D and 3D image-processing framework built directly into Houdini. It can be used to generate procedural textures, build masks, process images, and connect texture creation to the rest of a Houdini project.
Blender’s shader nodes are powerful, but they are mainly designed to calculate materials at render time. They are not a complete replacement for a dedicated node-based image and texture-processing system.
One of the closest alternatives we currently have in Blender is MatPlus. It allows you to construct procedural materials and texture-processing workflows with more control than Blender’s standard material system provides.
You can find it here:
https://superhivemarket.com/products/matplus?ref=311
But what about directing simulations?
Simulations are powerful, but getting them to produce a specific result can be extremely difficult. Houdini has tools such as Match Animation and Pin to Target constraints that allow simulated points to follow animated targets while still responding to physics.
This means you can guide cloth, soft bodies, particles, and other simulated objects toward a particular motion instead of leaving the entire result to the solver.
Blender has Pin Groups for cloth, and they work well for their intended purpose, but they are limited to cloth. You cannot easily pin a rigid body or soft body to an animated target while allowing it to continue responding naturally to the simulation.
Blender needs a universal Pin to Target system that works across different physics types.
Speaking of directing physics, what if you want deeper control over velocity fields and rigid-body constraints?
In Houdini, you can create custom velocity fields to direct smoke, particles, fluids, and other simulations. You can also control how individual rigid-body constraints bend, weaken, and break.
One of the closest Blender options for this level of destruction control is RBDLab. It provides a more procedural destruction workflow, including tools for fracturing, constraints, glue strength, break thresholds, and directing how a structure collapses.
If you want to create detailed, art-directed destruction in Blender, RBDLab gives you considerably more control than Blender’s standard rigid-body workflow.
You can find it here:
https://superhivemarket.com/products/rbdlab?ref=311
Finally, let’s talk about one of the less exciting but incredibly useful parts of Houdini: attribute visualizers.
Debugging data in Houdini is surprisingly intuitive. You can visualize vectors, normals, temperature, velocity, masks, or practically any custom attribute directly on the geometry in the viewport.
In Blender, we have the Spreadsheet, which is useful for examining exact values. However, it is still difficult to visualize custom data directly on the geometry without connecting it to a material or building a separate Geometry Nodes setup.
Blender needs a dedicated Attribute Visualizer that can display any field or named attribute as a colour, vector, number, or viewport overlay. I should not need to route an attribute through a colour ramp and an emission shader just to find out whether my math is working.
I want to be clear: this is not a “Blender bad, Houdini good” video.
Blender is incredible, especially when you consider that it is free and open source. The fact that addon developers behind tools such as Hurricane, MatPlus, and RBDLab are bringing these advanced VFX workflows to Blender shows just how strong the community is.
Houdini has been developing these systems for decades and was built around procedural VFX from the beginning. Blender is coming from a different direction, but the gap is slowly becoming smaller.
Still, a Blender artist can dream.
I want to remap the time of a cloth simulation without rebuilding everything. I want to paint fire spreading across a wall. I want to pour a million grains of sand into a bowl. I want to create several simulation variations automatically and compare them without spending the entire day changing values and rebaking.
Maybe one day, someone in the Blender development community will watch a video like this and decide to build one of these features. If you do, please tag me. I would love to see it.
That is my list. If I missed your favourite Houdini feature, or there is a Blender addon that already solves one of these problems, let me know in the comments.
Subscribe if you are new, and check the description for all the addon links mentioned in this video. I will see you in the next one.